Homemade Telecaster
NOTE: this is not a tutorial on how to make a guitar! I did some pretty jank things with the limited tools I had. Please do proper research if you decide to get into luthiery.
2019 was my Summer of Love, because that was the summer I discovered The Beatles. As a child of Chinese immigrants, I was never exposed to The Beatles' music growing up, instead listening mainly to classical pieces to supplement my piano lessons. So classic rock wasn't so classic to me; this was something really novel.
I decided I wanted to play their songs on the guitar. I didn't even know how to play guitar, so I set about learning. I borrowed my friend's acoustic, but it didn't have the same feel as the tangy electric guitars that The Beatles played. But I didn't feel like sinking money into an electric guitar, and I felt like I couldn't find one that would fit my small hands. This is when I resolved to build my own.
I had pretty limited experience in woodworking, but I knew I could make this work. To mix electric and acoustic tones, I settled on a semi-hollow telecaster design. I kept the scale length at the standard 25.5", but I made the neck slimmer to fit my hands. With these attributes in mind, I CADed this template up on Autodesk Inventor as a router guide.

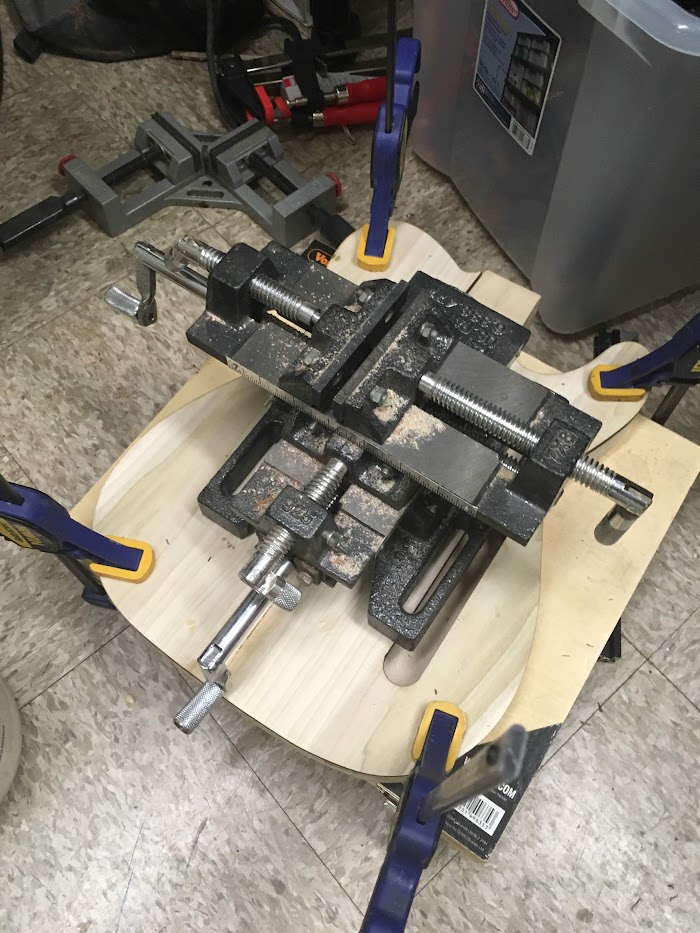
I laser cut the MDF router guide out of 1/2" MDF, which the laser did NOT like. Took me so many passes to cut it. In the meantime, I had glued together some 1/2" poplar boards for the actual body of the guitar. Using the router guide, I cut out the general shape of the telecaster and the hollow parts. I drilled out the hollow parts first before using the router to clean things out to save time.
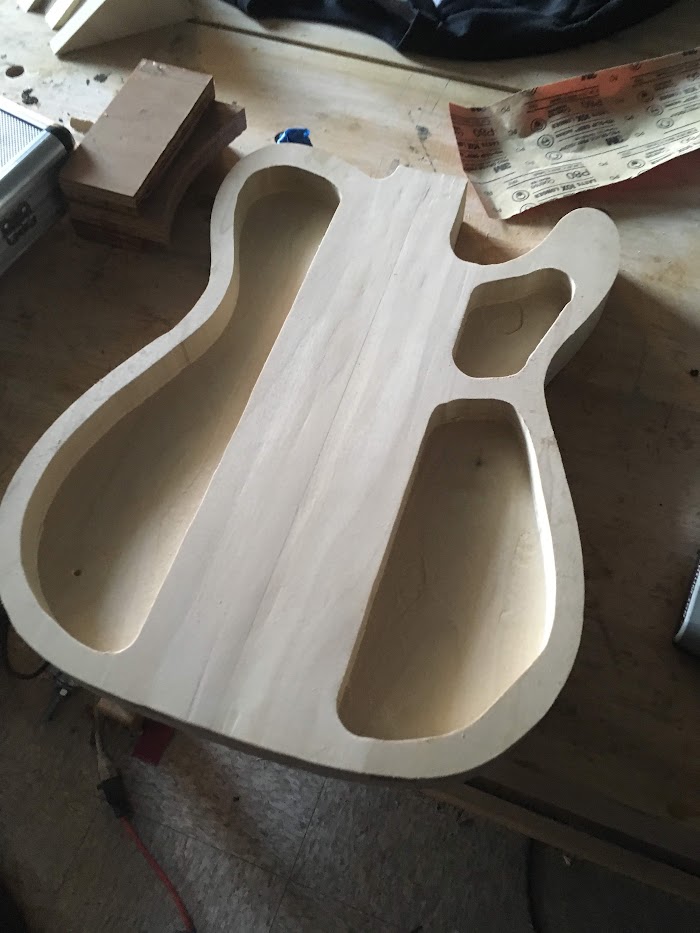
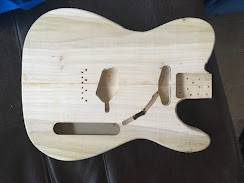
I laser cut a separate router guide for the top of the guitar to cover all the holes. After routing the top, I glued the base and top together. C L A M P S were used.
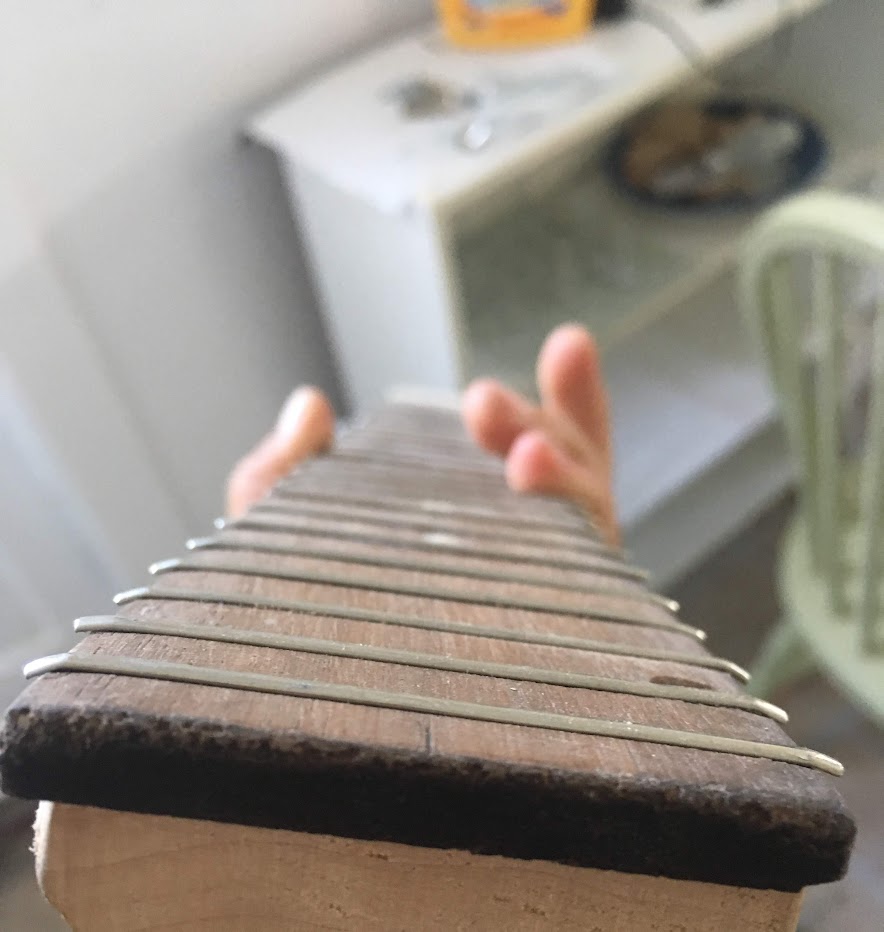
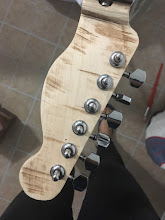
While I waited for the glue to seal overnight, I worked on the neck. This was by far the hardest part, and I'd recommend a luthier n00b to buy a neck before attempting to make their own. I had routed out the outline of the neck out of a 1" maple board, but sanding smooth the back of the thing took forever, even with an electric sander. I got the neck to a reasonable curvature eventually, but it definitely needs smoothing. I laser cut a fretboard out of Home Depot walnut and after inserting the truss rod, I glued it onto the neck's base. I even added the little guide dots. Usually, those dots are made of pearl, but I had nothing of the sort, so I used a mixture of white paint and salt (??) to fill those holes in. This is peak lo-fi.
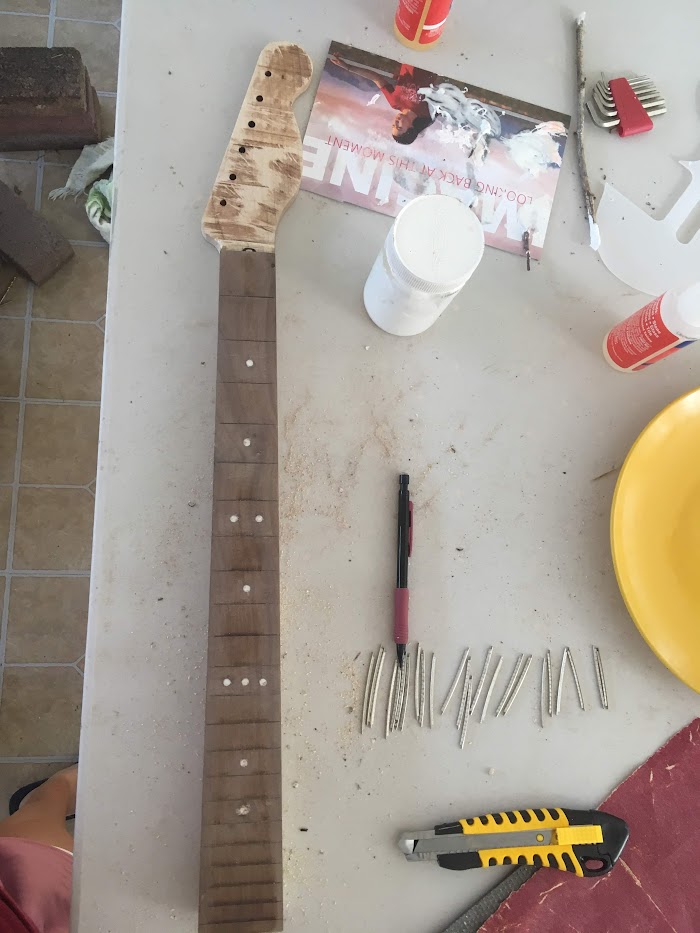
Hammering the frets in was also difficult. I had ordered some frets from Alibaba, but it turned out they were for a different neck curvature. This meant I had to do some extra finagaling to get the frets to fit my fretboard. Alas, there are still some bumps, but it's good enough for me to solo Hotel California.
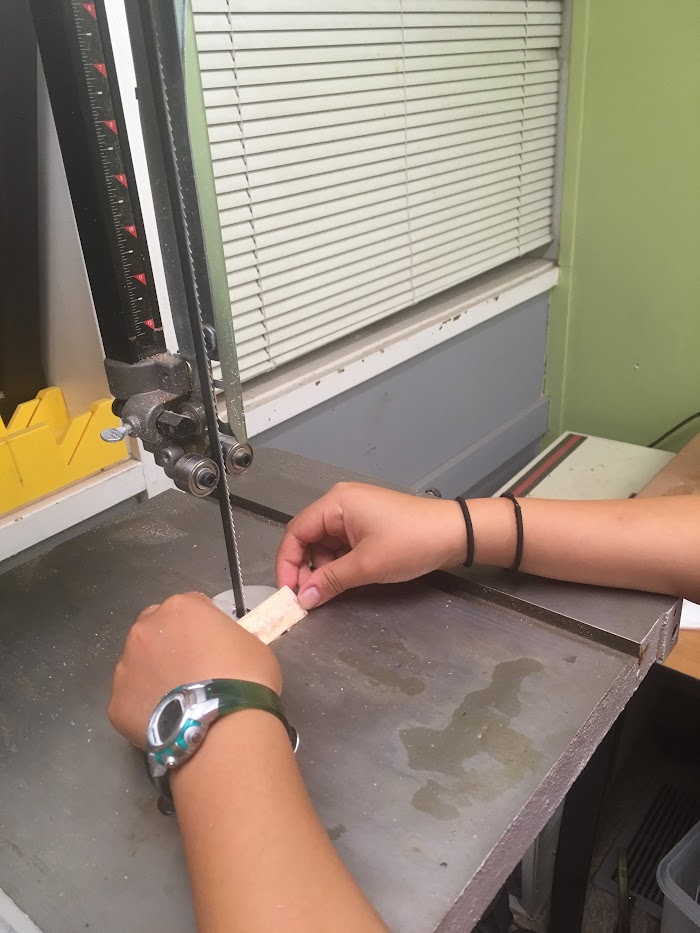
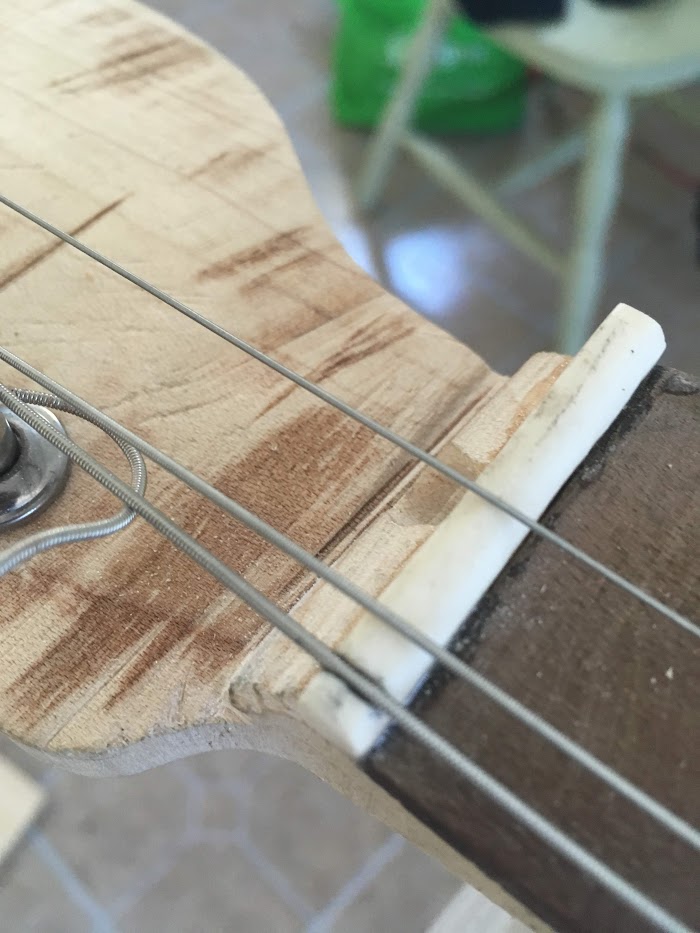
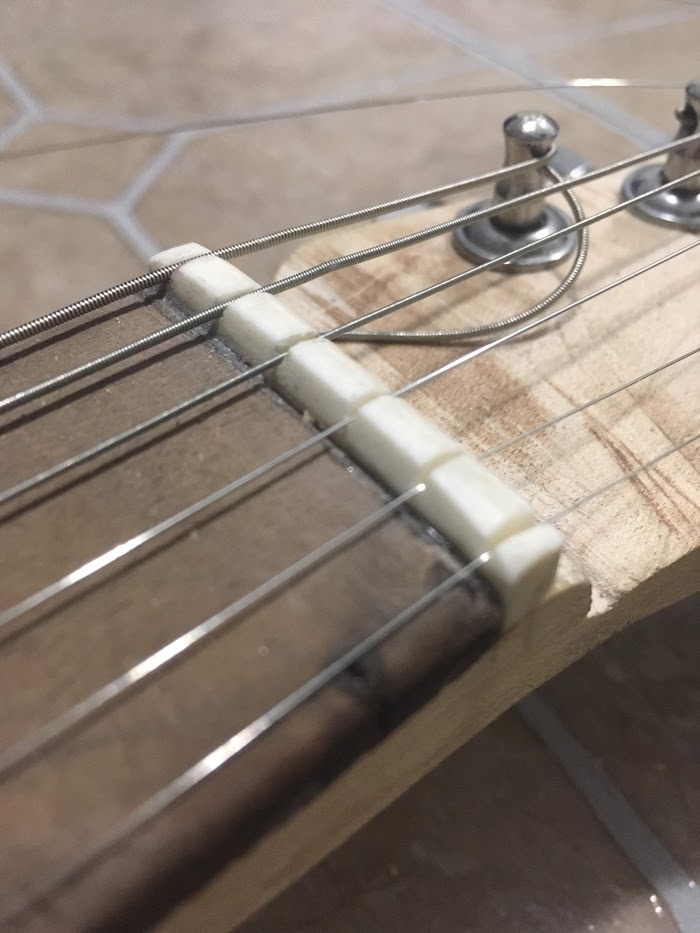
I made the nut (the part at the top of the fretboard where the strings hold tension) next. Most nuts are made of bone, and mine is no different. I made a late-night Safeway run to buy a bone-in beef shank. My dad and I ate it, marrow and all, and headed to MakeX to shape the bone. Foolishly, I started out by using a wood bandsaw to cut the piece of bone, thinking it wouldn't be so bad. DO NOT DO THIS. Bone is much a harder material than a wood bandsaw can handle, and I ended up almost igniting it and filling the room with the acrid scent of burnt bone. I resorted to the hacksaw, a safer but slower tool.
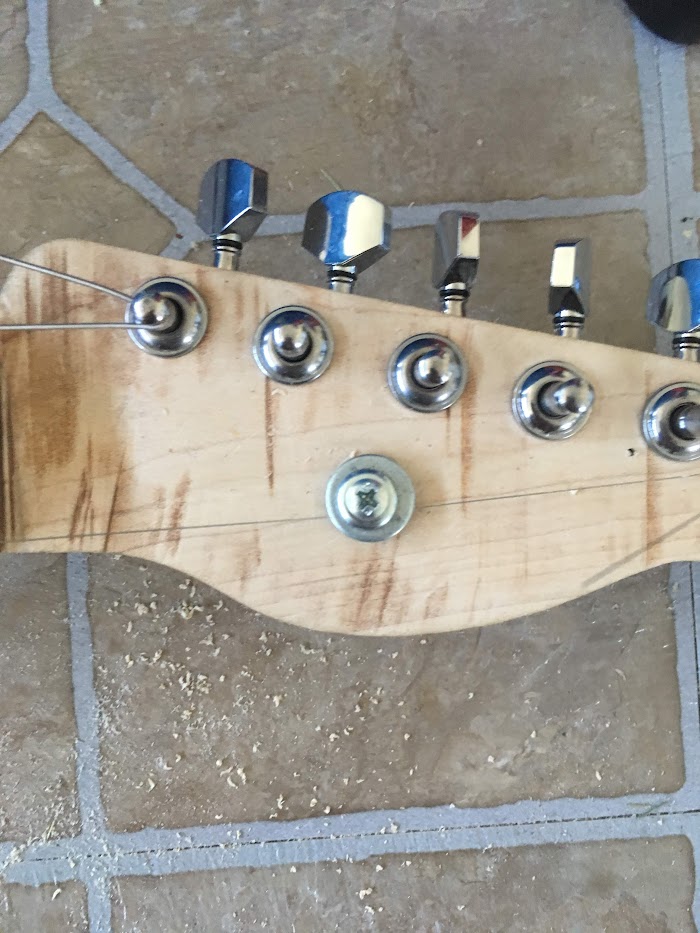
I drilled holes for the pegs and put the pegs in. Pretty straightforward.
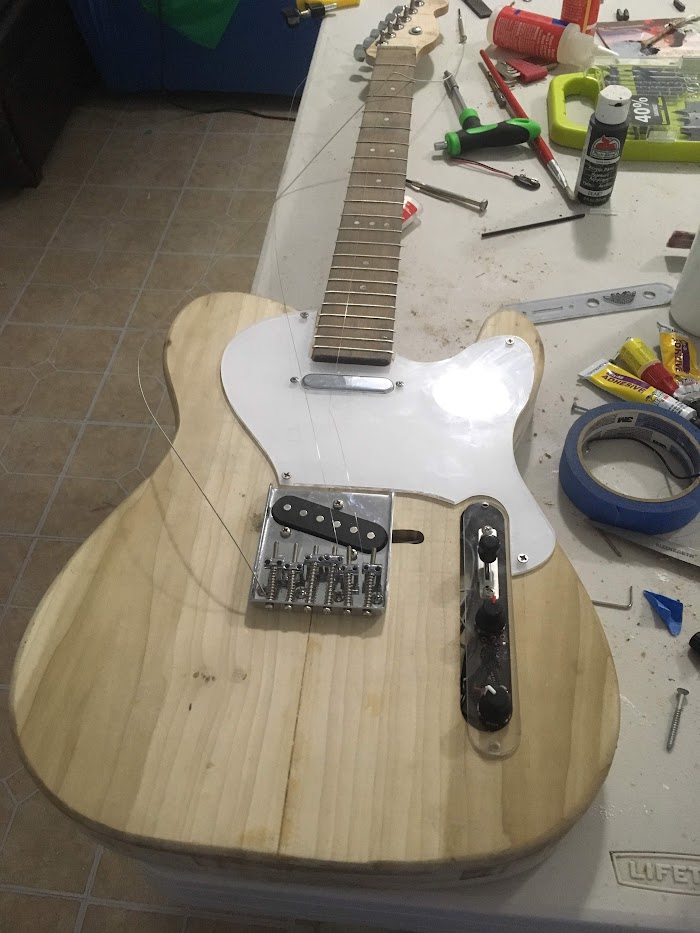
With the neck and body finished, it was assembly time. I screwed the neck onto the base, attached the bridge (the metal part on the body that holds the end of the strings), then attached the strings. I had to do some fine tuning to cut the grooves in the nut to hold the strings.
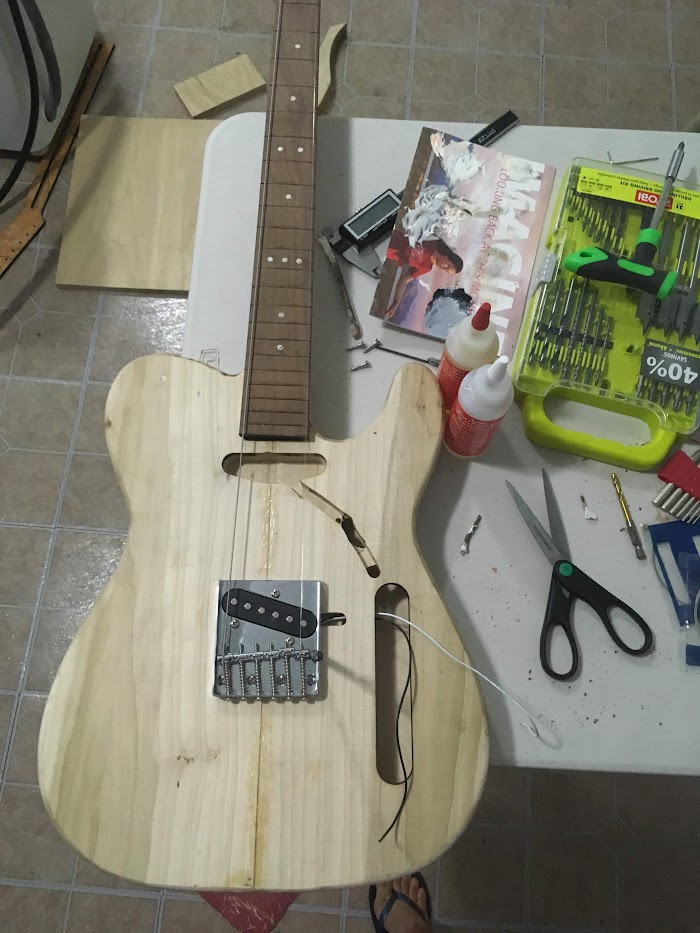
Also, I found that the E and B strings, the highest two strings, kept slipping to a lower tension while I tuned it. To fix this, I made a makeshift tensioner out of a screw and washer. Tensioning problems resolved after that.
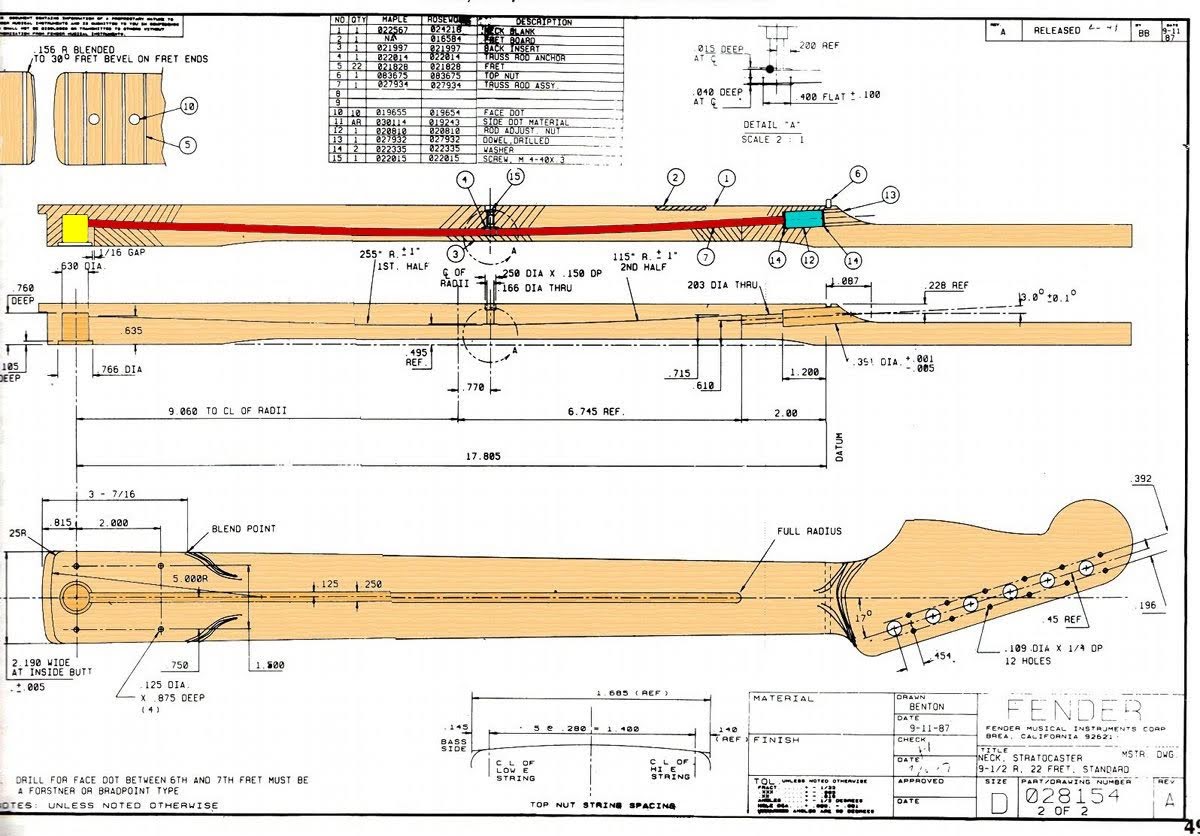
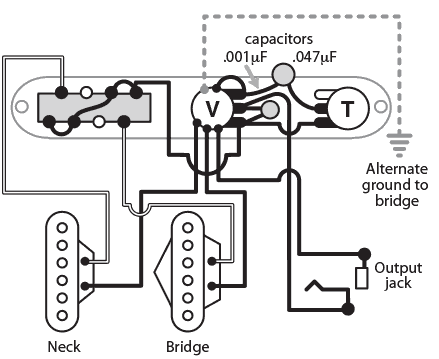
I put in the electronics following the schematic below, then laser cut a custom pick guard. It's all coming together now.
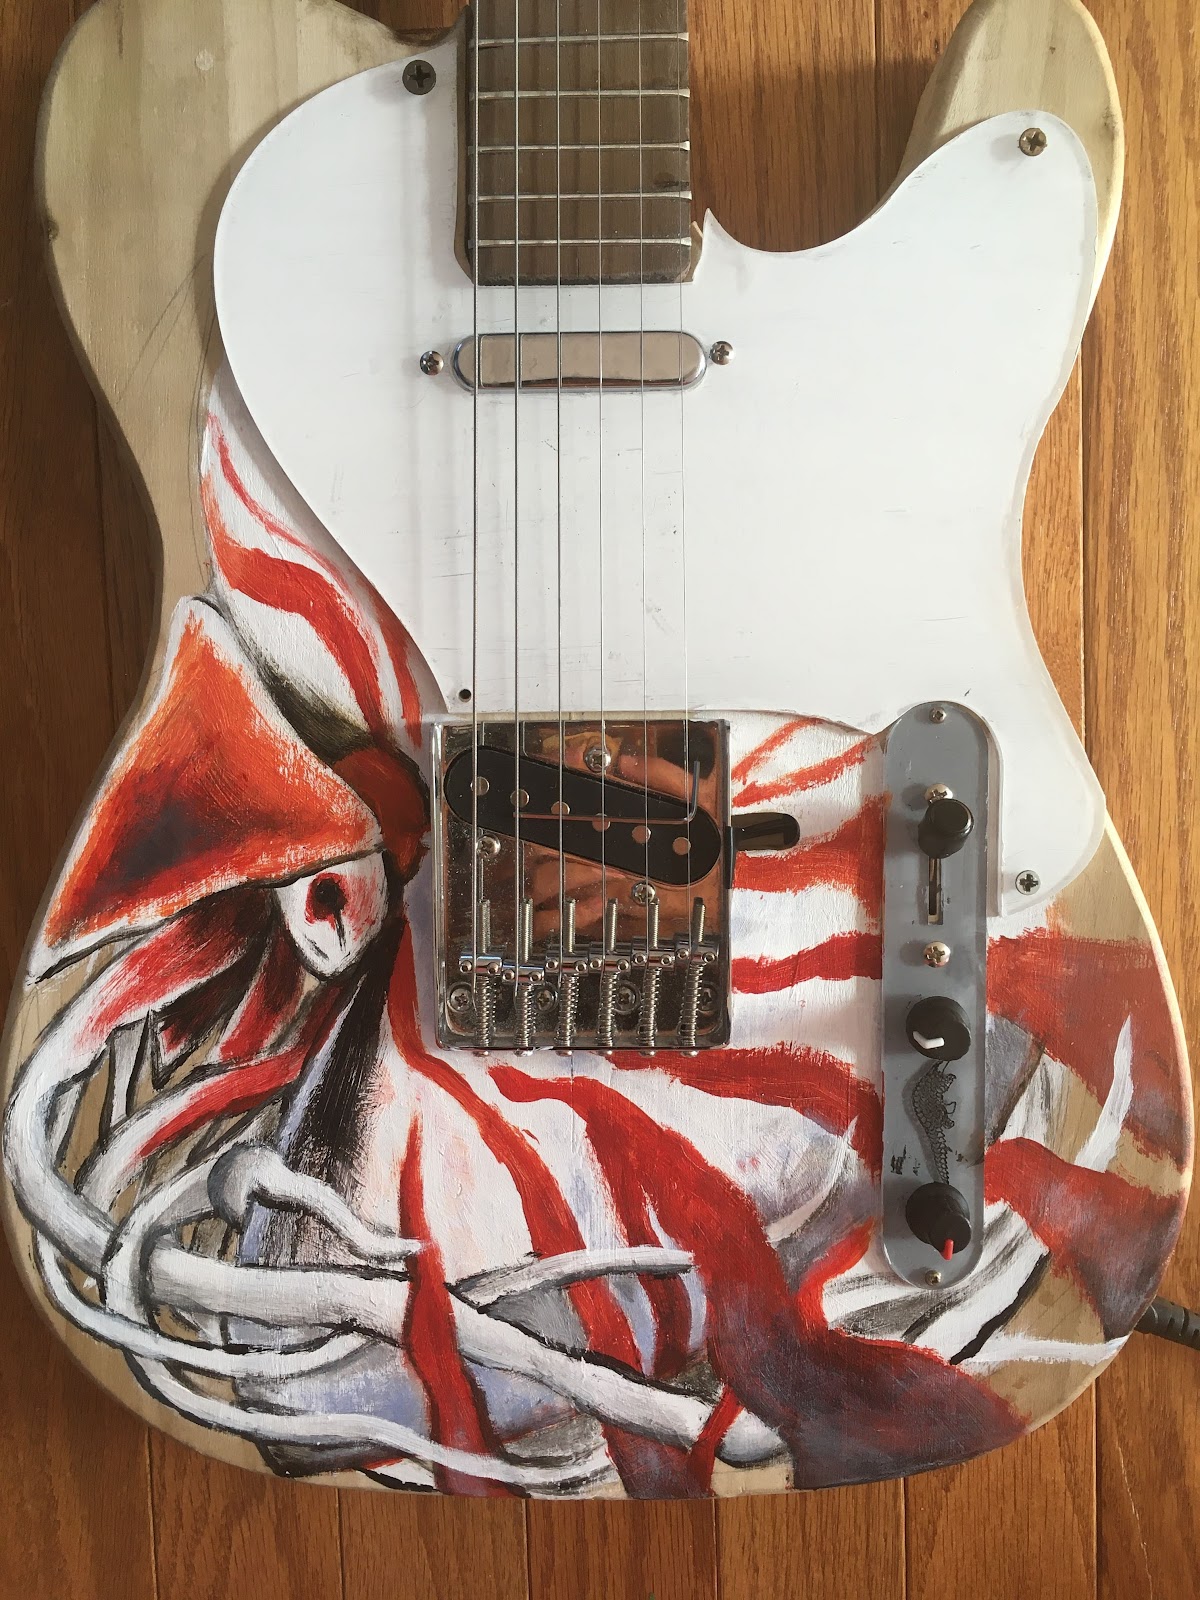
At last, I painted an abstract-looking nautilus on the body. Finished! (but to be quite honest, is it ever really finished?)
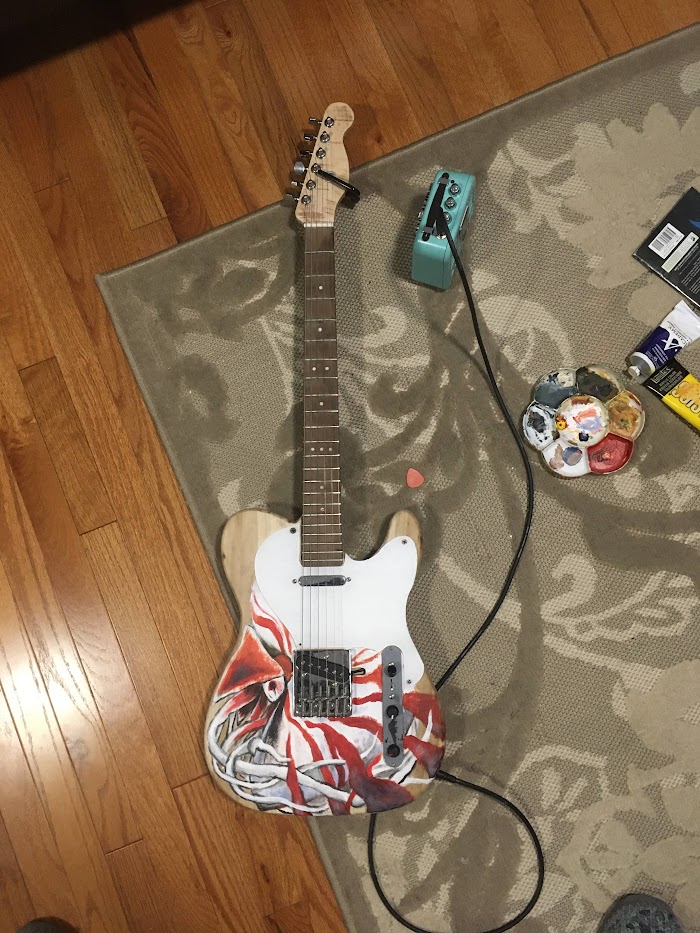
Here's a video of me actually playing the thing. It's "Here Comes the Sun." I think it's pretty good after playing the guitar for just a month!